| Welcome, Guest |
You have to register before you can post on our site.
|
| Online Users |
There are currently 141 online users.
» 0 Member(s) | 130 Guest(s)
Amazon, Bing, Claude, DotBot, Google, MJ12, OpenAI, Petalbot, Semrush, Seznam, Trendiction
|
| Latest Threads |
New Holland Hydraulic Fit...
Forum: Equipment Parts , Attachments & Tools
Last Post: MikePhua
Yesterday, 07:56 PM
» Replies: 0
» Views: 4
|
Why Tracks Jump to the Ou...
Forum: Excavator Repair Shop & Troubleshooting
Last Post: MikePhua
Yesterday, 07:56 PM
» Replies: 0
» Views: 3
|
Twin-Engine Scraper Throt...
Forum: Excavator Repair Shop & Troubleshooting
Last Post: MikePhua
Yesterday, 07:55 PM
» Replies: 0
» Views: 2
|
Understanding Light Switc...
Forum: Operator Talking
Last Post: MikePhua
Yesterday, 07:54 PM
» Replies: 0
» Views: 6
|
John Deere 650H Dozer: A ...
Forum: Operator Talking
Last Post: MikePhua
Yesterday, 07:54 PM
» Replies: 0
» Views: 4
|
Hydraulic System Failures...
Forum: Excavator Repair Shop & Troubleshooting
Last Post: MikePhua
Yesterday, 07:53 PM
» Replies: 0
» Views: 2
|
UHE vs Standard Transmiss...
Forum: Operator Talking
Last Post: MikePhua
Yesterday, 07:53 PM
» Replies: 0
» Views: 4
|
Need for Proper Excavator...
Forum: Excavator Repair Shop & Troubleshooting
Last Post: MikePhua
Yesterday, 07:52 PM
» Replies: 0
» Views: 2
|
Stiff Brake Pedal on Case...
Forum: Excavator Repair Shop & Troubleshooting
Last Post: MikePhua
Yesterday, 07:51 PM
» Replies: 0
» Views: 2
|
Driving a Backhoe on Pave...
Forum: Operator Talking
Last Post: MikePhua
Yesterday, 07:51 PM
» Replies: 0
» Views: 4
|
|
|
| Exploring Excavator Ownership: A 13-Ton Machine Owner's Experience |
|
Posted by: MikePhua - 06-30-2025, 01:43 AM - Forum: Operator Talking
- No Replies
|
 |
In July 2014, our editorial team visited the Dongba market in Beijing, a hub for construction equipment, to better understand the needs of excavator owners and their equipment usage. With the help of a friendly local operator, we quickly familiarized ourselves with the area and began our interviews.
The Excavator Market at Dongba
As we arrived at the market, we were greeted by a wide array of machinery, including both small and large crawler excavators, wheeled excavators (also known as rubber-tired excavators), backhoes, rollers, cranes, dump trucks, and other construction equipment parked along the roadsides. According to Mr. Xu, a local excavator operator, the market has been slower than usual this year, with fewer jobs compared to last year. When the weather is good, many machines head out to work, but during rainy days, the parking lot fills up quickly with idle equipment.
In our tour, we observed the ecosystem of the market—many repair shops, parts stores, gas stations, and construction sites are nearby. Some operators were resting in their machines while waiting for work, while others were busy maintaining their equipment.
Meet Mr. Xu: A Seasoned Excavator Operator
Mr. Xu, a 40-year-old operator from Northeast China, has been in the business since 2005. Starting with a joint venture, he bought his first excavator—a 60-ton wheeled machine. As his business grew, he bought a Hyundai 60W-7, but due to increasing demands, he hired a driver. By 2010, business was booming, and he decided to purchase a small car and sell his wheeled excavator. In the following years, Mr. Xu acquired a Komatsu PC130-7 and later a new SANY 140-8. He also invested in a flatbed truck and now employs two drivers. With a steady workflow, he has more time to relax, play cards, and spend quality time with his family.
Equipment Information: Komatsu and SANY Excavators
Mr. Xu’s SANY 140, purchased in 2013 for around ¥700,000 (with financing), features a Mitsubishi high-pressure common-rail engine and a 0.57 m³ bucket. With about 2,000 hours of use, the machine has required minimal maintenance. Mr. Xu appreciates the machine’s fuel efficiency and fast working speed. He values the support he receives from the dealership, even though a few minor issues were never addressed during the initial purchase due to a lack of a formal contract. This experience taught him the importance of having all terms in writing when buying equipment.
As for the Komatsu PC130-7, which he bought second-hand, Mr. Xu was satisfied with its performance. Powered by a direct-injection engine and manufactured in Jining, Shandong, the PC130-7 is known for its reliable hydraulic system and engine, both of which are imported. Fuel consumption is similar to the SANY 140, averaging ¥60–70 per hour. Mr. Xu was keen to show us the machine, which was working on a project at the time.
Business Operations
Mr. Xu’s machines mostly work on scattered jobs, with some larger projects mixed in. He charges by the "shift," with a typical 8-hour shift costing ¥1,500. Even for shorter jobs, he charges for a full shift. On average, he completes around 20 shifts per month, with no additional fees for transporting machines since most of his clients were former owners of wheeled excavators.
While Mr. Xu occasionally handles demolition jobs, his machines are not equipped with breakers, which are instead handled by friends in the industry. The market this year has been slower, with the busy seasons running from March to May and from September to November.
Machine Maintenance and Strategy
Having been in the business for nearly a decade, Mr. Xu knows how to maintain his equipment well. He emphasizes the importance of regular maintenance, especially with the high-quality Mobil engine oil he uses. While he typically uses aftermarket parts for repairs, he prefers original parts for critical components like air filters. He mentioned that genuine parts, although expensive, offer superior quality—he recalled how the original filter’s seams were perfectly sealed.
At the June 19th auction in Beijing, Mr. Xu attended as part of the Iron Baby buyer group and considered buying a smaller excavator for future needs. He believes that as large-scale construction projects wind down, the demand for smaller excavators will grow, along with the promotion of various attachments.
The Workforce
Mr. Xu currently employs two drivers, both in their early 20s. One has been with him for five years, and the other has three years of experience. Despite the relatively low wages of ¥4,500 per month (with lodging provided), Mr. Xu values his drivers' responsibility and loyalty. He gives them an annual bonus of ¥2,000–3,000 and takes on the responsibility of transporting machines between sites himself, showing that mutual understanding is key to their relationship.
Conclusion
Mr. Xu’s journey in the excavator business has not been without challenges, especially with market fluctuations and a lack of formal contracts in the past. However, he remains optimistic about the future. He is confident that with careful management and the right equipment, his business will continue to thrive. Mr. Xu’s story is an excellent reminder for equipment owners to stay proactive, maintain good relationships with their workers, and ensure that all agreements are clearly documented.
We sincerely thank Mr. Xu for sharing his valuable insights and wish him continued success in his business. As for future excavator owners, this visit has been insightful, and we look forward to learning more from other machine owners to better understand their needs and experiences in the field.
|

|
|
| The Practical Benefits of Excavator Window Tinting: A Test and Analysis |
|
Posted by: MikePhua - 06-30-2025, 01:42 AM - Forum: Operator Talking
- No Replies
|
 |
During the hot summer months, especially in cities like Beijing where temperatures can reach 40°C, excavator operators face immense pressure to work under the scorching sun. As the heat intensifies, the topic of window tinting for excavators often arises, sparking debates among equipment owners. Proponents argue that window tinting helps reduce heat and eases the strain on air conditioning, while opponents claim it may hinder visibility, particularly during nighttime operations. To shed light on this debate, we conducted a comprehensive test to evaluate the actual benefits of excavator window tinting.
The Test Setup
To thoroughly assess the impact of window tinting, we partnered with Li Hongliang, a seasoned excavator operator in Hebei Xianghe, who owns two Caterpillar 306E excavators. One of the machines had window tint applied, while the other remained untinted. This allowed us to compare the performance of both machines under similar conditions.
Selecting the Right Film
Before we started the tinting process, we sought advice from a professional shop on how to select the right window film. They shared several methods to assess film quality, which we categorized as follows:
- Look
High-quality window film offers excellent clarity and transparency, typically over 90%. The color of the film does not significantly affect visibility, even in low-light conditions. In contrast, low-quality films often have a cloudy appearance, especially noticeable at night or during rain.
- Smell
Premium films use non-toxic adhesives that are odorless. Low-quality films, on the other hand, often have strong, unpleasant odors due to high levels of solvents like benzene, which can be harmful to health.
- Touch
High-quality films feel thick and smooth, while inferior films are thin, flimsy, and prone to wrinkling.
- Look Again
A good film will be bubble-free and smooth. Poor films tend to form tiny bubbles and wrinkles due to impurities in the adhesive.
After choosing the right film, we also learned some additional tips from the supplier, such as using a fingernail to scratch the film (low-quality films will lose color), and that the tint’s heat resistance depends on the thermal layer, not the color layer.
The Tinting Process
Before applying the film, it is crucial to prepare the vehicle properly. Measuring the window area ensures that enough film is purchased to avoid waste. Additionally, it’s best to apply window tint on cloudy days or after rain, as this minimizes dust and floating particles that can create bubbles. Applying the tint under direct sunlight can cause the film to wrinkle or bubble, negatively affecting its appearance and performance.
Post-Tinting Testing
We conducted temperature and light intensity tests on both the tinted and untinted excavators from 12 PM to 2 PM, the hottest part of the day. The outdoor temperature during testing was 30°C.
- Untinted Excavator Test
- Seat headrest temperature before exposure: 44.3°C
- Outdoor sunlight intensity: 647W/㎡
- Light intensity through the window: 514W/㎡
- Seat headrest temperature after 30 minutes of exposure: 49.4°C
- Tinted Excavator Test
- Seat headrest temperature before exposure: 36.6°C
- Outdoor sunlight intensity: 665W/㎡
- Light intensity through the window: 225W/㎡
- Seat headrest temperature after 30 minutes of exposure: 47.7°C
Results Analysis
The test results clearly show that the tinted excavator experienced a significant reduction in light intensity. The light passing through the tinted window was reduced by 440W/㎡, much lower than the untinted machine. After 30 minutes of exposure, the seat headrest temperature in the tinted excavator was 1.7°C lower than the untinted one, demonstrating the tangible heat reduction benefit of window tinting.
Operator Feedback
We also interviewed Li Hongliang, the operator, to get his perspective on the use of tinted windows for excavators. He mentioned that tinting noticeably reduces the strain on the air conditioning system, helping it cool the cabin faster and more efficiently, leading to lower fuel consumption. Additionally, he observed that tinted windows reduce glare, making it easier on the eyes and improving comfort during long shifts. As for nighttime operations, he assured us that good lighting from the headlights compensates for any minor loss of visibility caused by the tint.
Conclusion
From our tests and operator feedback, it is clear that window tinting for excavators provides several benefits. Not only does it help in heat reduction, but it also reduces the workload on air conditioning, improving fuel efficiency. Additionally, it minimizes glare, enhancing comfort during the day. Although the temperature difference may seem small (1.7°C), this shows that tinting does have a noticeable effect on slowing down the cabin's temperature rise. Given the benefits, especially during long hours under the sun, window tinting is indeed a worthwhile investment for excavators.
|

|
|
| Considering the Purchase of a New Holland EC35 Excavator: Key Considerations |
|
Posted by: MikePhua - 06-30-2025, 01:38 AM - Forum: Operator Talking
- No Replies
|
 |
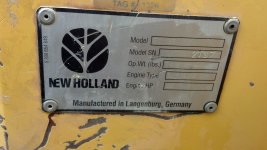
If you’re thinking about buying a New Holland EC35 excavator, there are a few key things to consider before moving forward. Here are some of the concerns I had while evaluating this used equipment, and the insights shared by others in the process:
1. Cylinder Repacking
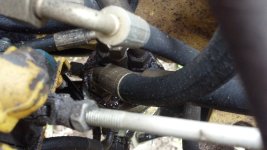
One of the cylinders on the machine appears to be leaking, which raises a valid concern about the cost of repacking it. Repacking a cylinder can be expensive, depending on the severity of the leak and whether the cylinder itself is damaged. It's essential to factor in the cost of repairs for this when assessing the overall value of the machine.
2. Hydraulic Tank Leak
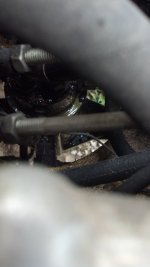
There’s a tank located under the hydraulic manifold that seems to be leaking. This could be a significant issue, especially if it's affecting the hydraulic system. The cost of repairing or replacing the tank can vary widely, depending on its size and the extent of the damage. If the leak is minor, a simple seal replacement might do, but if the tank is severely damaged, it may need to be replaced entirely.
3. Engine Replacement
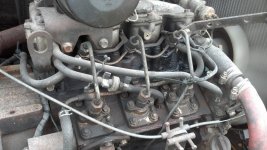
The engine has been replaced with an Isuzu engine. While Isuzu engines are generally known for their reliability, it’s important to assess how well the engine integrates with the rest of the excavator's systems. If the engine was installed correctly, it could be a good choice, but it's always wise to inspect the engine’s condition thoroughly and check for any issues related to the retrofit.
4. Price and Seller Transparency
The seller is asking $12,500 for the excavator, but there are some concerns about the transparency of the transaction. While the seller may not seem overtly dishonest, it’s important to approach with caution. When questioned about potential issues, the seller seemed to downplay them, which can be a red flag. For example, the seller had a Bobcat 331 listed for sale but had to stop the sale after a drive motor blew while loading it onto a truck. Such instances raise questions about the seller’s reliability.
5. Vehicle History and Theft Concerns
Before committing to any used equipment purchase, it's wise to run a background check, especially if the seller seems "sketchy." One option is to have the serial number of the excavator checked by local authorities to ensure that it hasn’t been stolen or involved in any illegal activity. This step could help prevent unexpected issues later on.
Conclusion
While the New Holland EC35 excavator might offer good value at first glance, potential buyers should proceed carefully. It’s crucial to assess the machine's mechanical condition thoroughly, consider the cost of repairs (such as cylinder repacking and hydraulic tank repairs), and verify the legitimacy of the transaction. Always remember: if something feels off during the inspection or negotiation process, it might be best to walk away.
In summary, a little caution, proper inspection, and background checks can go a long way when purchasing used equipment like the New Holland EC35.
|

|
|
| How to Choose the Right Long Boom Configuration for Your Excavator |
|
Posted by: MikePhua - 06-30-2025, 12:18 AM - Forum: Operator Talking
- No Replies
|
 |
The long boom is a vital attachment for excavators, designed to extend their reach and versatility. It is a custom piece that significantly enhances the machine's performance and is often chosen based on specific project needs. Here is a guide on how to select the right long boom configuration for your excavator:
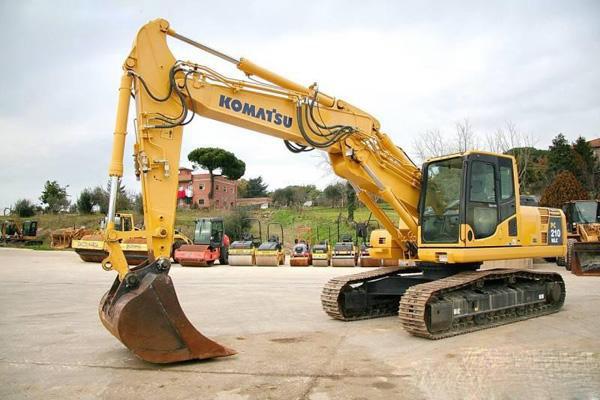
1. Types of Long Booms
Excavator long booms are typically classified into two main types: - Two-Stage Long Boom: The boom can extend up to 13-26 meters and is most commonly used for earthworks, deep trenching, and long-distance dredging tasks.
- Three-Stage Long Boom: These booms can extend up to 16-32 meters and are often used in high-rise building demolition and similar heavy-duty tasks.
2. Key Considerations for Selecting a Long Boom
When selecting a long boom, the weight class of your excavator plays a key role in determining the configuration. Here are the most common configurations based on the machine's weight class:- For 10-16 Ton Excavators:
- Extension: Up to 13 meters
- Configuration: 1 bucket, 1 bucket cylinder, 6 pins, 4 high-pressure hoses, 3 grease pipes, 1 link assembly, and a counterweight (1-3 tons). The arm is configured with a 7.1-meter long boom and a 5.9-meter long arm.
- For 20-22 Ton Excavators:
- Extension: Up to 15.38 meters
- Configuration: 1 bucket, 1 bucket cylinder, 6 pins, 4 high-pressure hoses, 3 grease pipes, 1 link assembly, and a counterweight (1-3 tons). The arm is configured with an 8.22-meter long boom and a 7.16-meter long arm.
- For 20-25 Ton Excavators:
- Extension: Up to 18 meters
- Configuration: 1 bucket, 1 bucket cylinder, 6 pins, 4 high-pressure hoses, 3 grease pipes, 1 link assembly, and a counterweight (1-3 tons). The arm is configured with a 10-meter long boom and an 8-meter long arm.
- For 25-34 Ton Excavators:
- Extension: Up to 20 meters
- Configuration: 1 bucket, 1 bucket cylinder, 6 pins, 4 high-pressure hoses, 3 grease pipes, 1 link assembly, and a counterweight (1-3 tons). The arm is configured with an 11-meter long boom and a 9-meter long arm.
- For 35-40 Ton Excavators:
- Extension: Up to 22 meters
- Configuration: 1 bucket, 1 bucket cylinder, 6 pins, 4 high-pressure hoses, 3 grease pipes, 1 link assembly, and a counterweight (1-3 tons). The arm is configured with a 12-meter long boom and a 10-meter long arm.
- For 40-50 Ton Excavators:
- Extension: Up to 26 meters
- Configuration: 1 bucket, 1 bucket cylinder, 6 pins, 4 high-pressure hoses, 3 grease pipes, 1 link assembly, and a counterweight (1-3 tons). The arm is configured with a 14-meter long boom and a 12-meter long arm.
3. Compatible Excavator Brands
Long booms are available for various excavator brands. Some of the well-known brands that offer long boom configurations include:- Caterpillar (CAT)
- Komatsu (PC)
- Hitachi (EX, ZAX)
- Kobelco (SK)
- Daewoo (Doosan) DH
- Hyundai ®
- Kato (HD)
- Case (CX)
- Sumitomo (SH)
- Volvo (EC)
- LiuGong
- Yuchai
- SANY
- XCMG
4. Selecting the Right Long Boom
When selecting the right long boom, consider the specific needs of your project. Longer booms are suitable for tasks that require greater reach, such as demolition, deep digging, and material handling over long distances. Ensure that the boom’s extension and the excavator’s lifting capacity match your project’s requirements.
In conclusion, choosing the right long boom configuration will depend on factors such as the size of your excavator, the nature of your work, and your reach requirements. By selecting the correct attachment, you can enhance the performance and efficiency of your excavator in various applications.
|

|
|
| Nine Key Considerations for Replacing Diesel Engine Cylinder Head Gaskets |
|
Posted by: MikePhua - 06-30-2025, 12:17 AM - Forum: Excavator Repair Shop & Troubleshooting
- No Replies
|
 |
When replacing the cylinder head gasket on a diesel engine, attention to detail is essential to ensure optimal performance and prevent further issues. Here are nine key points to follow during the process:
1. Ensure Correct Cylinder Sleeve Height
The top surface of the cylinder sleeve shoulder must be higher than the engine block surface by the specified distance. If the cylinder sleeve shoulder is too high, the lower surface of the sleeve can be ground down to achieve the correct height. If it is too low, copper shims can be used at the contact surface to compensate.
2. Retighten Cylinder Head Bolts After Initial Operation
For newly installed or refurbished engines, after running for 240-250 hours, it is important to re-tighten the cylinder head bolts.
3. Tighten Cylinder Head Bolts in Sequence
Always tighten cylinder head bolts in the specified sequence, in three stages. The torque should be neither too high nor too low, and all bolts must be tightened to the same torque specification.
4. Ensure Proper Alignment of Bolts
When inserting standard bolts into the engine block, ensure that the alignment is perpendicular to the engine block. The misalignment should not exceed 1mm.
5. Replace Broken or Worn Bolts and Nuts
Replace any broken or worn-out bolts and nuts promptly. After tightening the cylinder head bolts into the engine block, ensure that no bulging occurs on the engine block surface.
6. Verify Engine Block Surface Flatness
During installation, carefully check the flatness of the engine block surface. Any dents or pitting near the water jacket holes should be sealed with copper shims to prevent leaks.
7. Choose the Correct Gasket Size
Ensure that the cylinder head gasket is the correct size and that the asbestos material is uniformly distributed. Check that the copper seals around the cylinder holes and water jacket holes are properly compressed without any damage, such as lifting or falling off. When removing old gaskets, be cautious not to damage them, and inspect the new gasket for any defects before installation. If a gasket cannot be repaired, it should be replaced.
8. Maintain Proper Engine Temperature
Ensure that the engine operates at a temperature between 75-95°C. If the engine temperature exceeds this range due to poor cooling or delayed fuel supply, immediately stop the engine and resolve the issue. Avoid running the engine under excessive loads for extended periods.
9. Prevent Gasket Burnout at Water Jacket Holes
To prevent the gasket from burning out at the three water jacket holes on the engine block's right side, modify the small circular holes on the gasket to align with the shape of the water jacket holes on the cylinder head. Then, use copper shims to compress or weld them into place. This reduces water flow resistance and protects the gasket from coolant damage.
By following these steps carefully, the diesel engine will have better longevity and reliability, ensuring smooth operation after the gasket replacement.
|

|
|
| Hydraulic Pump Replacement: A Critical Surgery for Excavators |
|
Posted by: MikePhua - 06-30-2025, 12:13 AM - Forum: Excavator Repair Shop & Troubleshooting
- No Replies
|
 |
For an excavator, the hydraulic pump is the heart of its hydraulic system. When this vital component fails and needs to be replaced, it’s akin to a heart transplant in humans—an extensive and delicate procedure. Besides selecting the right hydraulic pump and a skilled technician, there are many post-replacement considerations. Just like human heart surgery, close monitoring after the procedure is essential.
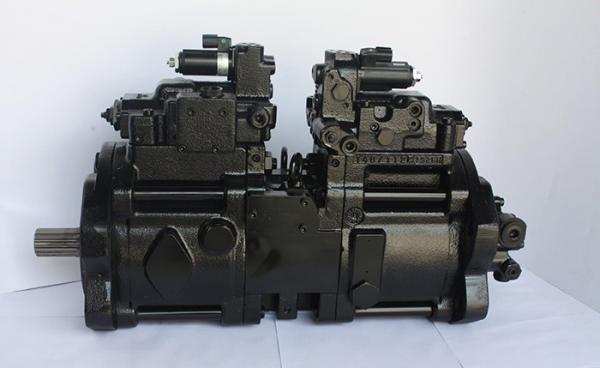
1. Monitor the Operation of the New Pump for Three Months
After replacing the hydraulic pump, it's crucial to observe the machine during the break-in period. Pay attention to unusual vibrations, odd noises, or abnormal temperature changes in the oil. If any irregularities occur, diagnose the issue promptly to determine the underlying cause.
2. Avoid Load Immediately After Starting the New Pump
When starting the new hydraulic pump, avoid applying a load right away. Allow the machine to run without load for a period, especially in colder temperatures, to ensure sufficient warm-up time. Only gradually add load once the hydraulic circuit is confirmed to be circulating properly. During this time, carefully monitor the machine's performance.
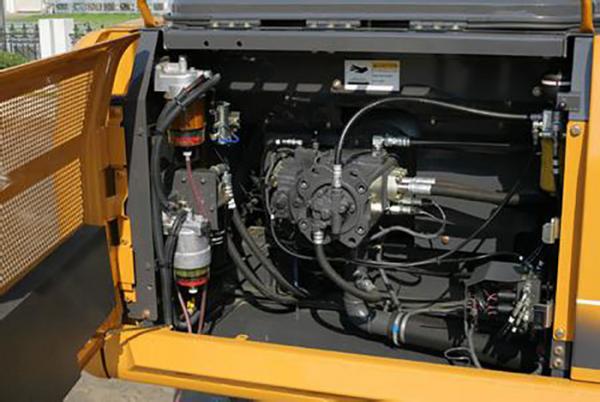
3. Monitor Hydraulic Oil Temperature
After running the new pump for a period, observe the temperature changes in the hydraulic oil. Test the maximum and minimum oil temperatures under typical working conditions. By comparing the results over time, you can verify if the oil level is adequate and whether the hydraulic oil and cooling system are compatible.
4. Pay Attention to Noise from the Hydraulic Pump
Since the new hydraulic pump hasn’t undergone wear, it may produce unusual sounds if the hydraulic oil is dirty, lubrication is inadequate, or the load is too high. It’s important to detect such noise promptly and make necessary adjustments.
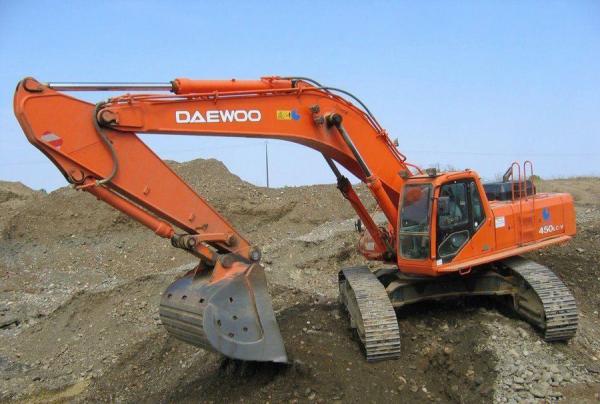
5. Observe the Machine's Movements
If the new hydraulic pump isn’t installed properly or the parameters don’t match, it may not be noticeable during idle operations. Therefore, when the machine starts actual work, pay extra attention to the smoothness of the excavator's movements and whether the power output is sufficient.
6. Adjust Hydraulic Valves After Replacement
Before the pump replacement, the owner or technician may have made adjustments to some hydraulic system valves. After installing the new pump, it’s essential to recalibrate the relevant valves to ensure they operate correctly and eliminate potential faults.
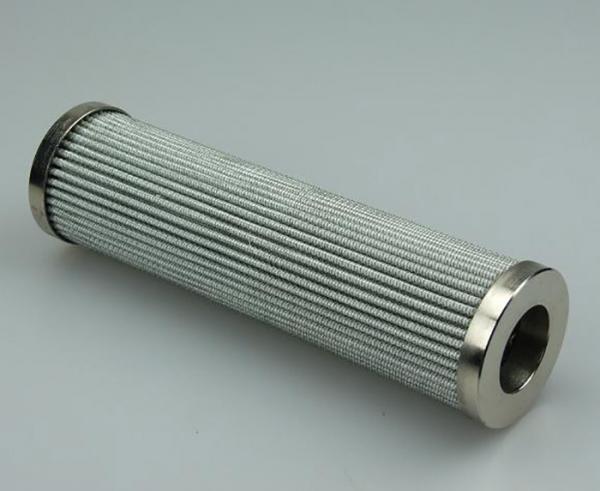
7. Regularly Check the Filter and Hydraulic Oil
After the pump replacement, regularly inspect the filters in the hydraulic circuit. Analyze the type and amount of contaminants on the filter screen to predict the source of potential failures. Additionally, check the hydraulic oil once a month to assess any degradation, discoloration, or contamination, which may indicate underlying issues.
Replacing a hydraulic pump is a significant task that requires careful attention both during and after the replacement. Proper monitoring and maintenance will ensure the excavator performs at its best and prevent any unforeseen issues from arising.
|

|
|
| A Beginner's Guide: How to Choose the Right Excavator Bucket |
|
Posted by: MikePhua - 06-30-2025, 12:10 AM - Forum: Equipment Parts , Attachments & Tools
- No Replies
|
 |
The bucket is one of the most important attachments on an excavator, with many different types and shapes designed for various functions. Choosing the right bucket can significantly enhance work efficiency. So, how do you pick the perfect bucket for your needs? Here are some practical tips to help you make an informed decision.
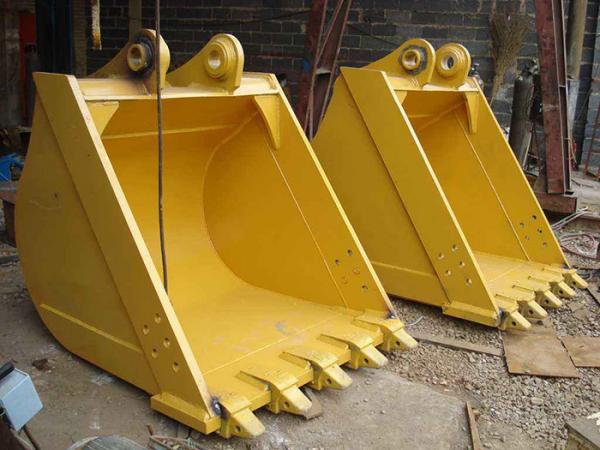
1. How to Choose the Structure and Material?
Excavator buckets (also known as digging buckets) are generally divided into two types based on their working method: standard buckets and reverse buckets. In this article, we focus on the commonly used reverse bucket. The structure of a reverse bucket is relatively simple and mainly consists of the following components: - Tooth seat plate
- Bottom plate
- Side plate
- Wall plate
- Mounting ear plate
- Back plate
- Bucket ears
- Bucket ear cover
- Bucket teeth
- Tooth seat
- Guard plate or bucket corner
These components can be adjusted based on the specific working conditions, and parts like edge plates and guard plates can be added or reduced as needed.
When it comes to materials, high-quality buckets are generally made of Q345B and HQ60 steel plates. Some premium buckets may use Swedish Hardox steel, which is more expensive. It's important to avoid buckets made primarily from A3 steel, particularly for the tooth seat plate and bottom plate, as these parts experience frequent friction and A3 steel wears out quickly.
2. How to Assess the Durability of the Bucket?
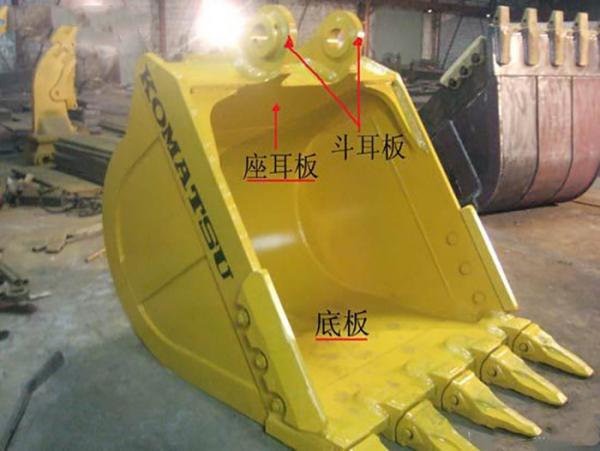
The most vulnerable parts of the bucket are the tooth seat plate and the connection between the bucket ear plate and the back plate. While the design of the tooth seat plate has less impact, the welding technique and material choice are critical for durability. To improve stability, the back plate should be designed to be longer, which increases the weld area and strengthens the connection between the bucket ear plate and the bottom part.
Additionally, welding quality significantly affects the bucket's strength. When choosing a bucket, check the number, quality, and alignment of the welds to ensure reliability.
Looking at the bucket from the front, you’ll notice that the opening is typically rectangular. A rectangular shape is less stable, so high-quality buckets reinforce the internal structure by adding four corner supports. Similarly, other parts, such as the bucket ear plates, can also include reinforcement ribs to further strengthen the design.
3. How to Select Bucket Attachments?
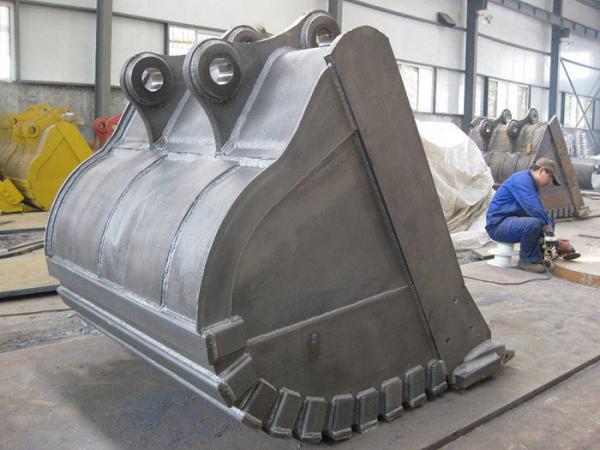
Excavator buckets have several attachments that often need replacing, including bucket ear covers, corner wear plates, and bucket teeth. Some manufacturers may use substandard attachments to reduce costs, so it’s essential to carefully inspect these parts during the purchasing process.
- Bucket Ear Covers
Originally, bucket ear covers were cast, but due to their lack of toughness, they would often break during work. Today, most manufacturers use 45# steel to make steel ear covers, which are much more durable. Even if they crack, they can be welded and repaired.
- Corner Wear Plates and Bucket Teeth
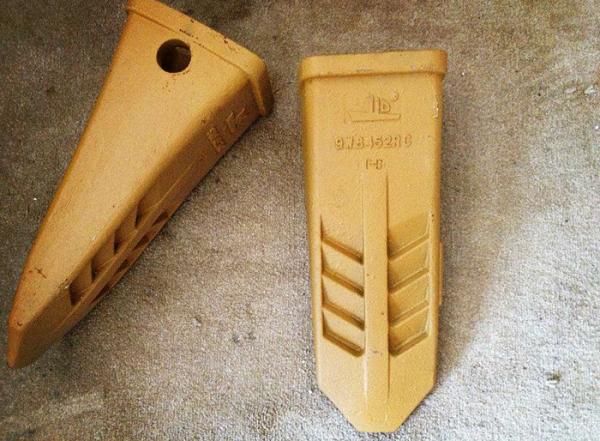
Corner wear plates and bucket teeth primarily bear the brunt of impact and wear, so they must have high wear resistance and hardness. These parts are typically made from high-carbon steel. To check the quality of cast parts, a simple method is to tap on them. High-quality castings produce a crisp sound, while low-quality ones have a dull, muted sound.
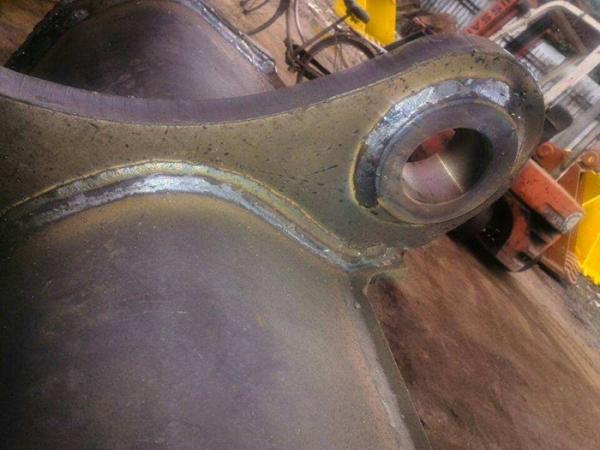
By understanding the structure, materials, durability, and attachment selection standards for excavator buckets, you can make a more informed choice, increase work efficiency, and extend the life of your equipment.
|

|
|
| Can You Trust Excavator Hour Meters? The Hidden Trick You Didn’t Know About |
|
Posted by: MikePhua - 06-30-2025, 12:07 AM - Forum: Excavator Repair Shop & Troubleshooting
- No Replies
|
 |
In the construction industry, the income of many equipment operators is based on the number of operating hours recorded by the machine's hour meter. However, some individuals have found ways to manipulate the hour meter, inflating the displayed hours to earn more money.
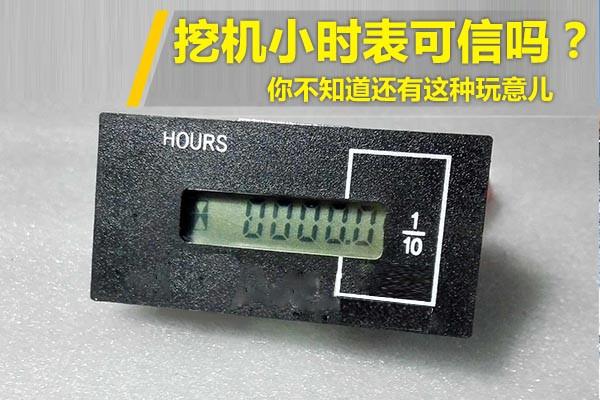
There are two primary methods used to alter the operating hours of excavators: one involves replacing the original hour meter with a special one, and the other involves installing a "time increaser" to interfere with the system’s signals. Here’s how they work:
1. Replacing the Hour Meter with a Special One
This method is relatively low-cost and simple. The special hour meters are designed to look almost identical to the original meters, and they can record time independently from the excavator’s main timing system. This allows users to adjust the displayed hours at will. By swapping out the original meter with one of these modified meters, it becomes easy to deceive site managers and make the machine appear to have more operating hours than it actually has. These modified hour meters are relatively inexpensive, typically ranging from a few dozen to a couple of hundred yuan each.
2. Installing a “Time Increaser”
This method is more sophisticated. It involves installing a device called a “time increaser,” which is connected to the engine's RPM signal circuit. This device sends a false signal to the system, making it believe that the engine is running even when it's not. As a result, the hour meter continues to accumulate hours whenever the excavator is powered on, even if the engine is not started. This method is more expensive, with prices typically ranging around a thousand yuan.
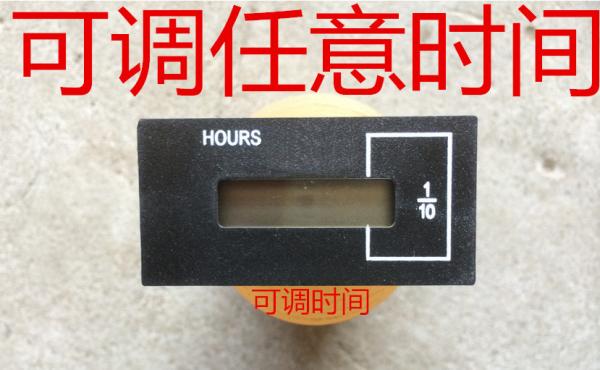
The Impact on the Industry
Manipulating hour meters to falsely inflate operating hours is, at its core, fraudulent behavior. It disrupts the normal order of the industry, undermining fairness and causing legitimate businesses to suffer. Due to weak regulation and low detection rates, this practice has been allowed to proliferate, becoming an open secret in the industry. If this continues, it will result in a situation where "bad money drives out good," leading to a loss of trust in the market and damaging the interests of all professionals in the field.
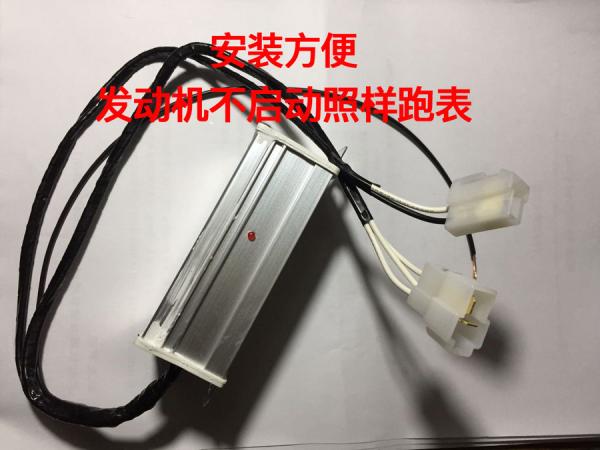
The Need for Integrity in the Industry
Maintaining a fair and healthy market environment requires the joint effort of everyone in the industry. Each individual should adhere to good professional ethics, conduct their business with integrity, and work together to resist such dishonest practices. Only by upholding a culture of integrity can the industry grow in a healthy and orderly manner, ensuring that all participants enjoy a fair and transparent working environment.
|

|
|
| Uncovering the Hidden Truth of Hour Meter Tampering in Used Excavators |
|
Posted by: MikePhua - 06-30-2025, 12:04 AM - Forum: Excavator Repair Shop & Troubleshooting
- No Replies
|
 |
In the second-hand excavator market, one of the most prevalent and concerning practices is the tampering of hour meters. The lack of regulation in the second-hand machinery trade, coupled with the low cost of tampering, has led to a vicious cycle, eroding trust in hour readings and making it difficult for buyers to trust the accuracy of these meters.
Two Types of Hour Meters
Currently, there are two types of hour meters on the market:
- Mechanical Meters: Found mostly on older models and domestic brand excavators. These can be easily tampered with by physically adjusting the meter.
- Digital Meters: Newer excavators generally use digital hour meters, which are more complex and require special software to hack and modify the data.
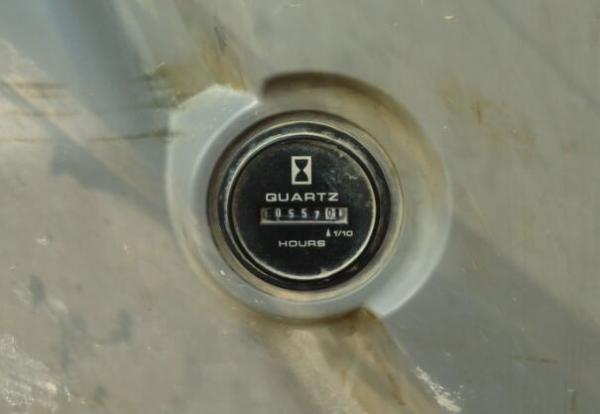
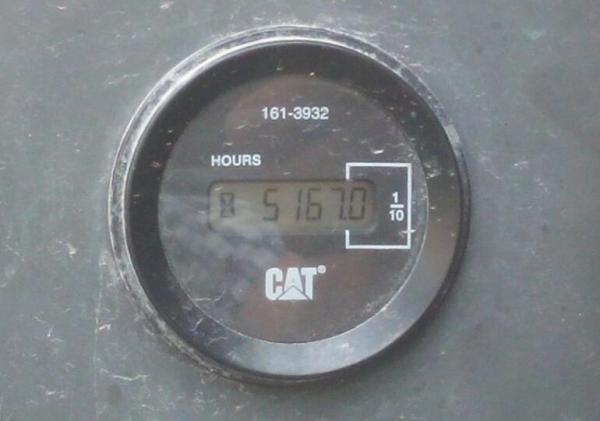
The Rise of an Industry: Hacking Hour Meters
The practice of hacking hour meters has become a lucrative industry. Specialized services now exist to modify these meters for a fee. Through extensive investigation, we were able to uncover the methods used by these individuals to manipulate the data.
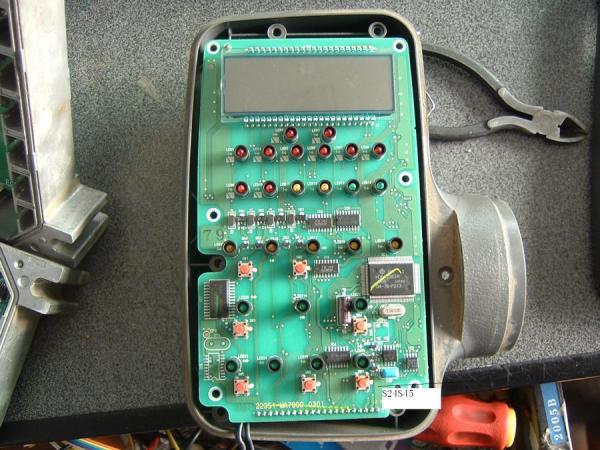
How the Tampering Works
To understand how the tampering works, we need to look at the principles behind the digital hour meter:- The time data is stored in an encrypted format within the digital meter’s computer board. By identifying the data storage location and using specialized software to modify the chip parameters, the time display can be adjusted to show any desired number of hours. While the exact methods may vary depending on the excavator brand and model, the process is generally the same.
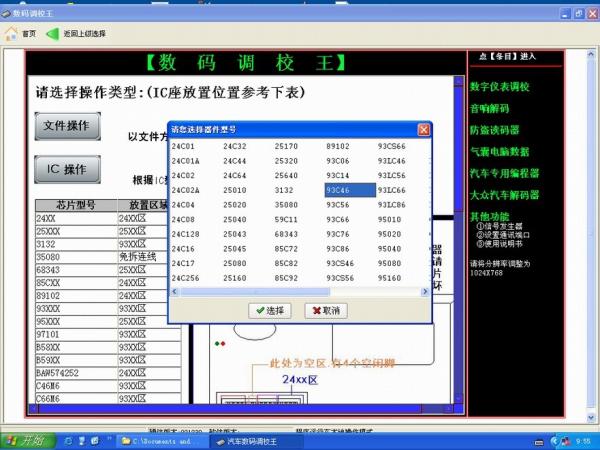
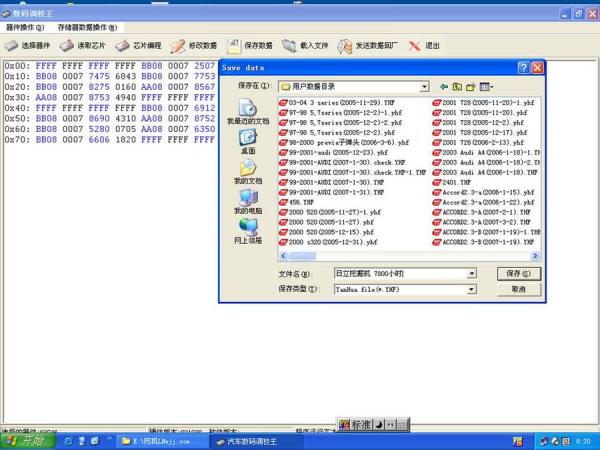
The Process of Modifying the Hour Meter
Here’s the basic process for tampering with an hour meter:
- Remove the Chip and Identify the Model
The first step is to disassemble the computer board, extract the circuit board, and locate the chip that stores the time data. Professionals who specialize in this know exactly where to find the chip and how to identify its model quickly.
- Locate the Data Storage on the Chip
Using specialized programming software, the data stored on the chip can be read and modified. All it takes is connecting the chip and opening the software.
- Read and Save the Data
Once the data is accessed, it is saved in a separate file for future reference.
- Modify the Data
The data is then adjusted to show the desired number of hours. Once the chip is reinstalled into the computer board and the excavator is powered on, the hour meter will display the modified value. This entire process can be completed in just 10 to 15 minutes by a skilled technician. For example, a 20,000-hour machine can easily be modified to appear as though it has only 2,000 hours.
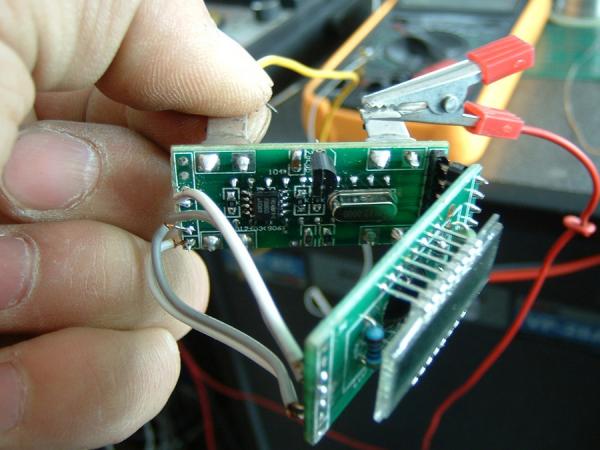
The Dark Side of the Used Machinery Market
The practice of tampering with hour meters is just one of many issues plaguing the used construction machinery industry. It reveals a deeper societal problem regarding integrity. Initially, a few dishonest sellers exploited this practice to make quick profits, disturbing the fairness of the market. Over time, however, even the honest sellers felt forced to engage in tampering just to remain competitive, leading to the creation of an underground industry dedicated to modifying hour meters. There are now even paid courses teaching people how to adjust hour meters.

An Ongoing Struggle for Integrity
While it may be difficult for any one entity to fully reform the industry and eliminate these dishonest practices, the push for progress remains crucial. Even though it’s an uphill battle, the goal is to promote integrity and transparency within the used equipment sector, ensuring a healthier, more trustworthy marketplace for all.
|

|
|
| Transmission Air Circuit Failures and Solutions |
|
Posted by: MikePhua - 06-29-2025, 11:59 PM - Forum: Excavator Repair Shop & Troubleshooting
- No Replies
|
 |
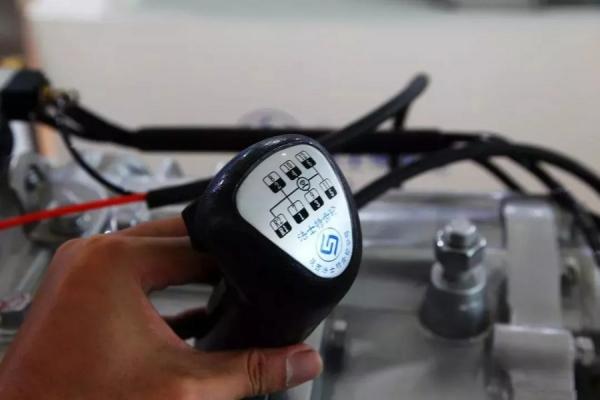
The Fast Transmission is widely used in SANY’s heavy equipment, with its distinctive main and auxiliary box, dual intermediate shaft structure, and air-operated control system leaving a strong impression on users. However, properly handling air circuit failures, especially those related to the dual-H valve, can be quite challenging.
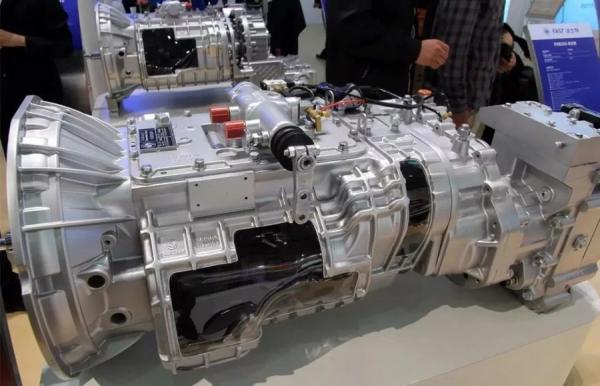
Failure Symptoms and Root Cause Analysis
When the transmission selects a low gear, compressed air passes through the low gear exhaust port of the dual-H valve and enters the low gear intake of the auxiliary shift cylinder, pushing the piston to the right. During this process, residual air in the cylinder is expelled through the high gear exhaust port of the dual-H valve, which typically produces a brief exhaust sound. This is normal. However, if the exhaust persists for too long, it can affect gear shifting, becoming a failure symptom.
It's important to note that air leakage in the dual-H valve is not due to the valve’s quality, but rather the result of poor sealing in the auxiliary shift cylinder, which causes air leakage and is reflected in the dual-H valve.
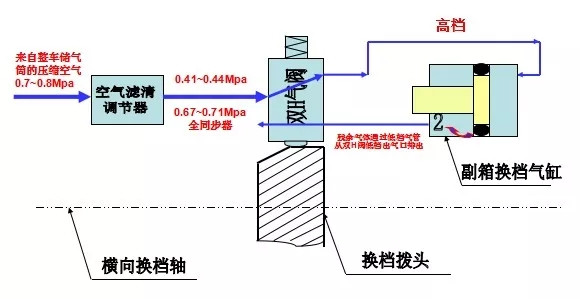
When the transmission selects a high gear, compressed air enters the high gear intake of the auxiliary shift cylinder through the high gear exhaust port of the dual-H valve, pushing the piston to the left. As this happens, residual air is expelled through the low gear port. This process also produces a short exhaust sound, but if the exhaust persists for too long, it can similarly disrupt gear shifting.
Sealing Issues and High-Low Gear Shifting Problems
The auxiliary shift cylinder uses three sealing rings to maintain a relatively sealed environment. However, as wear and tear accumulate over time, the sealing environment of the cylinder can be compromised. This leads to delays or failure to shift properly when changing between low and high gears.
In many repair situations, technicians may assume that air leakage from the dual-H valve requires a replacement of the valve itself. While changing the valve may temporarily resolve shifting issues, it does not address the root cause. The increased air pressure from a new dual-H valve may temporarily enhance the piston’s pushing force, superficially solving the gear shifting problem. However, the sealing environment of the cylinder remains unaddressed, and the issue will resurface shortly. This could lead to further damage, such as the wear or burning of the auxiliary shift cylinder.
Correct Repair Method
To properly address the issue of high-low gear shifting difficulty, the first step should be to check the sealing of the auxiliary shift cylinder. Replace any failed sealing rings or repair the damaged cylinder body to restore a proper seal. Only then should other air circuit components be considered for replacement to ensure an accurate and effective resolution.
In conclusion, correctly diagnosing the root cause of air circuit failures and focusing repairs on the sealing of the auxiliary shift cylinder will help avoid recurring failures from temporary fixes, ensuring long-term reliability and stable operation of the equipment.
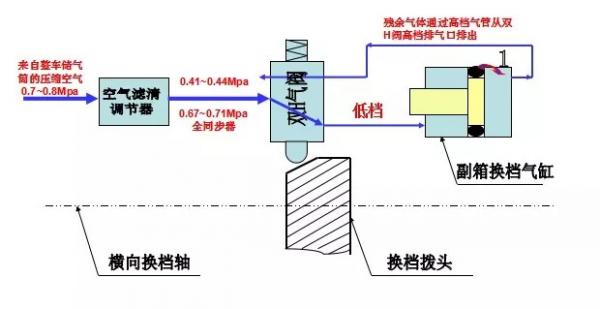
|

|
|
|